Getting started with Tutorised
On this page you will find everything you need to run the assessment with your students.

Step-by-step:
running the assessment
1. Log in
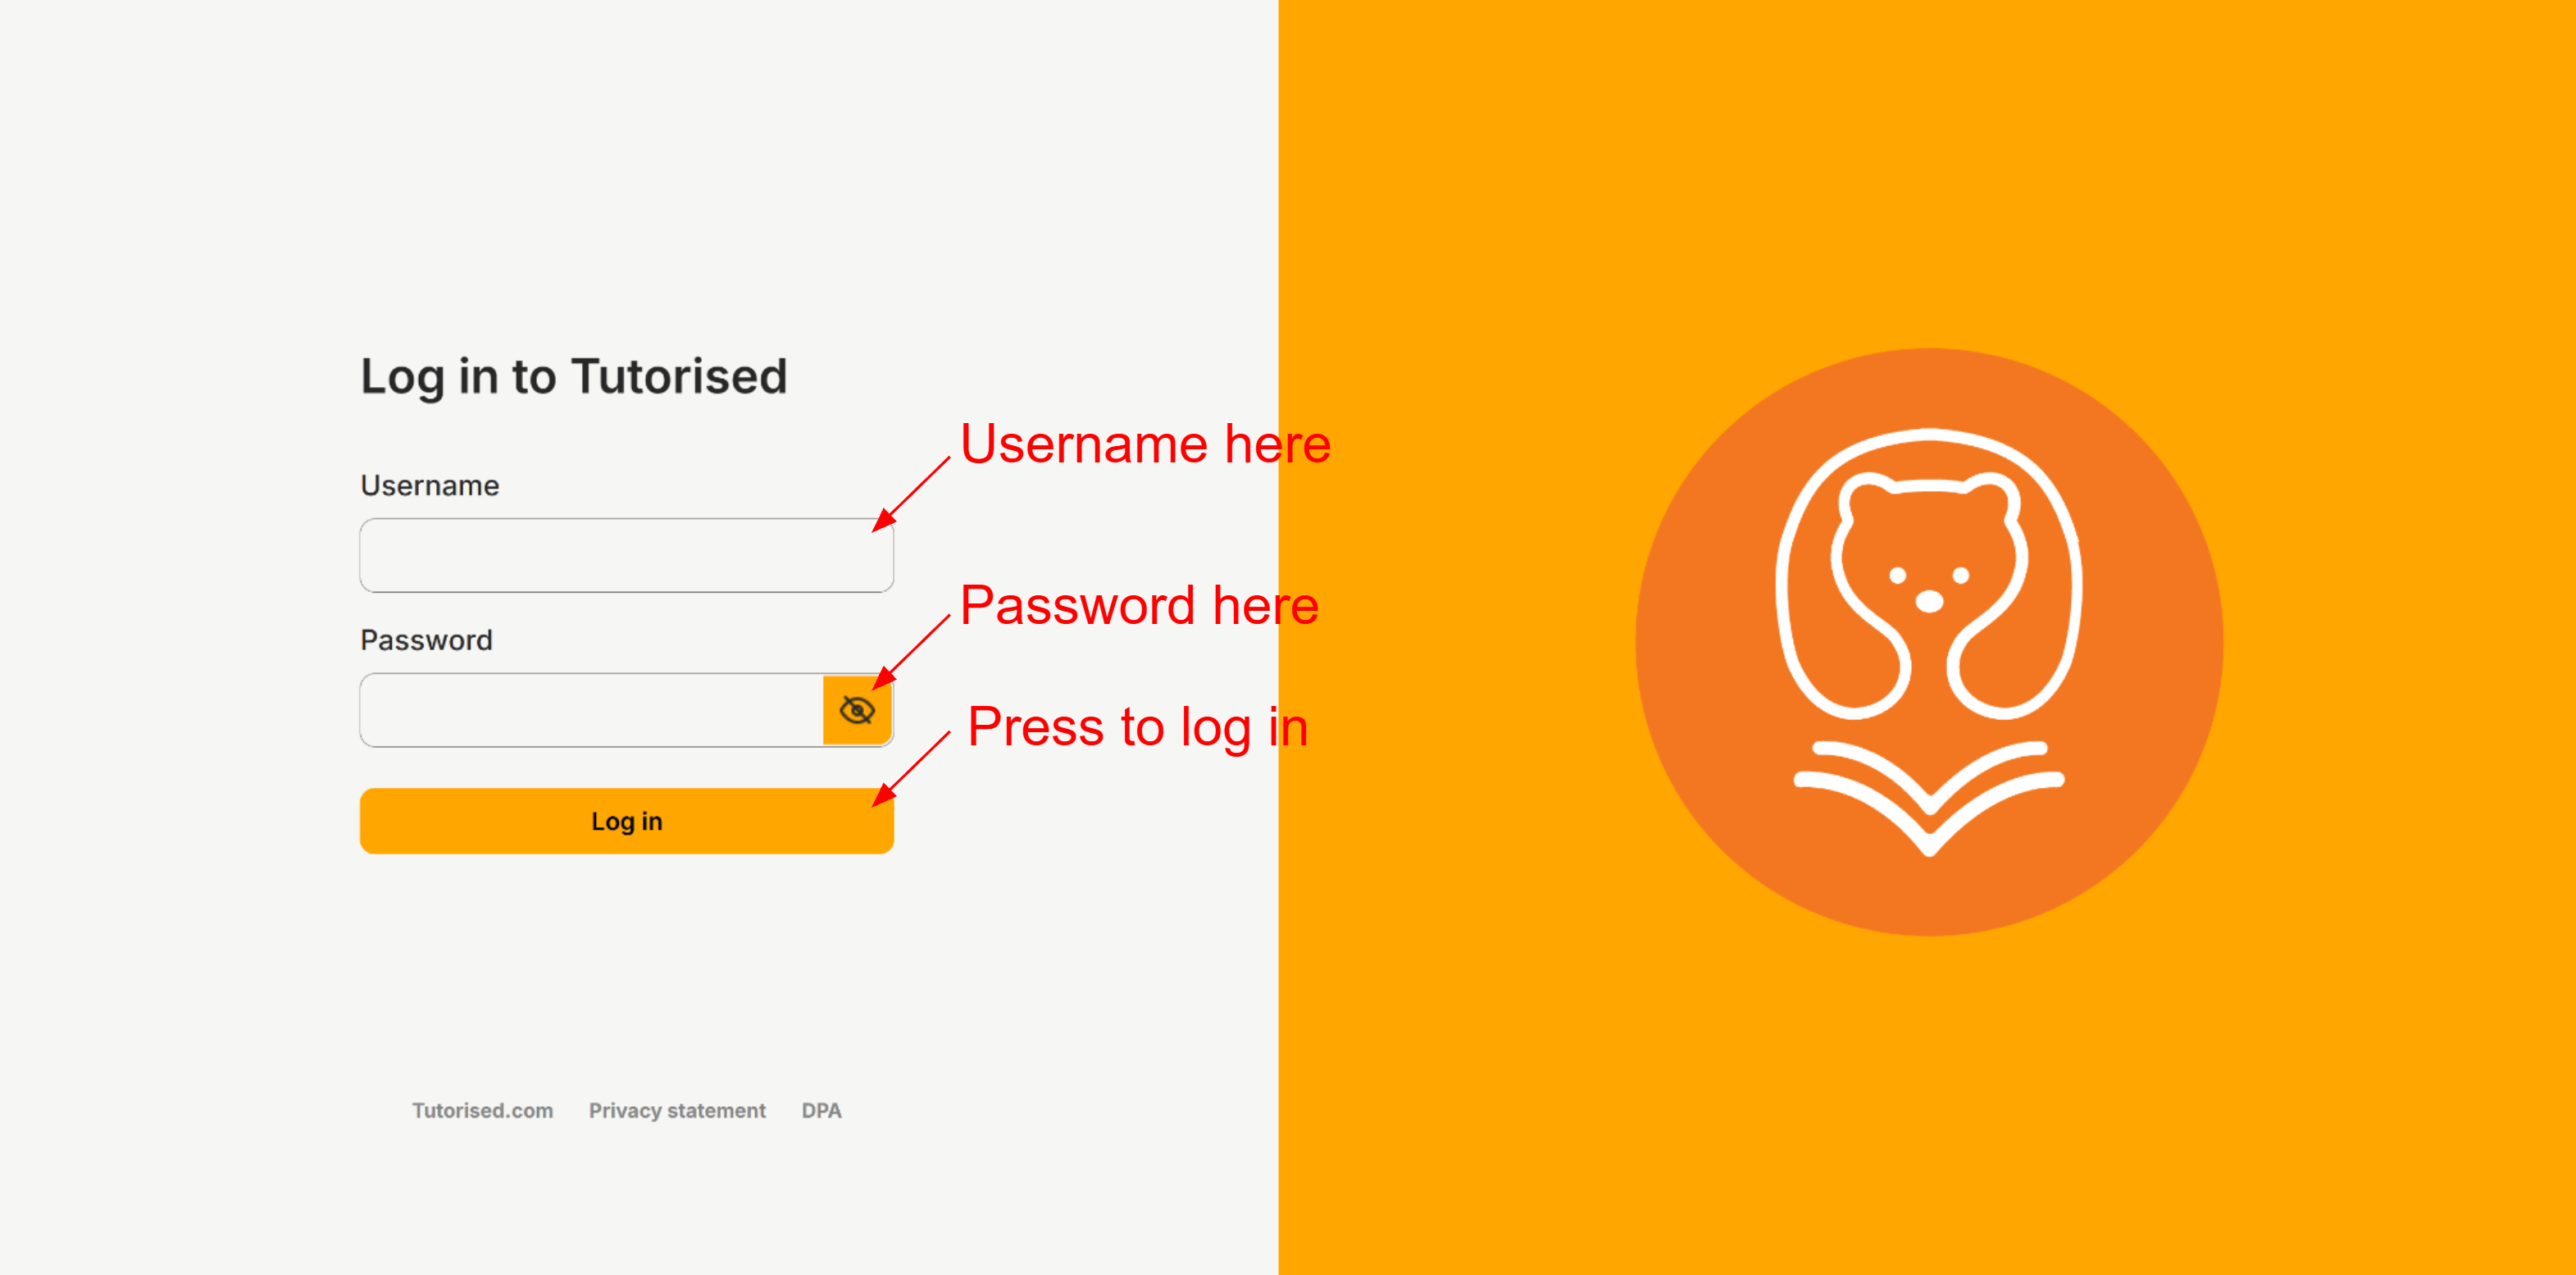
Go to egrader.io and add login credentials.

2. Add new group
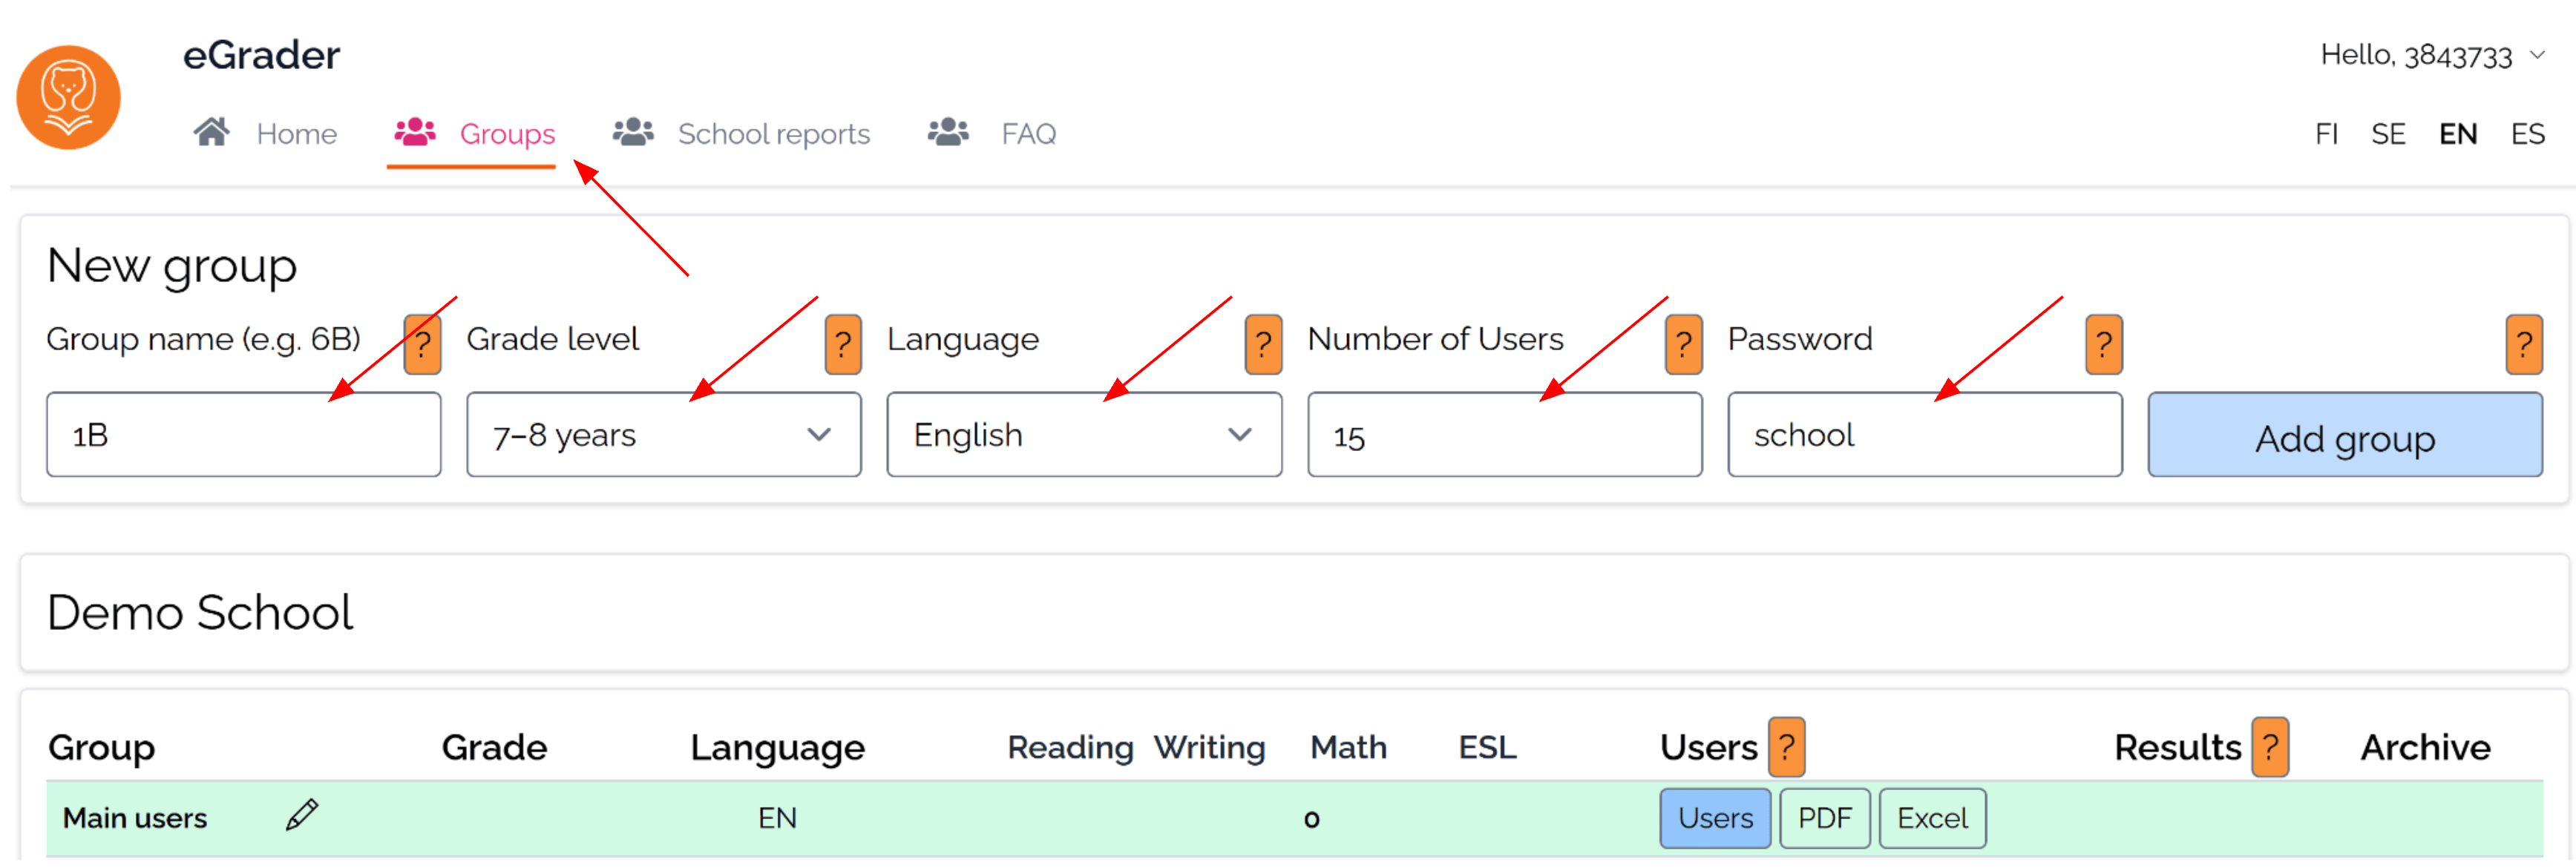
Go to the Groups tab, enter the group details, set a password, and press Add group.
NOTE! When creating the group, please enter children’s age correctly in the Grade Level section, as this determines which test version they will receive.
3. Group details
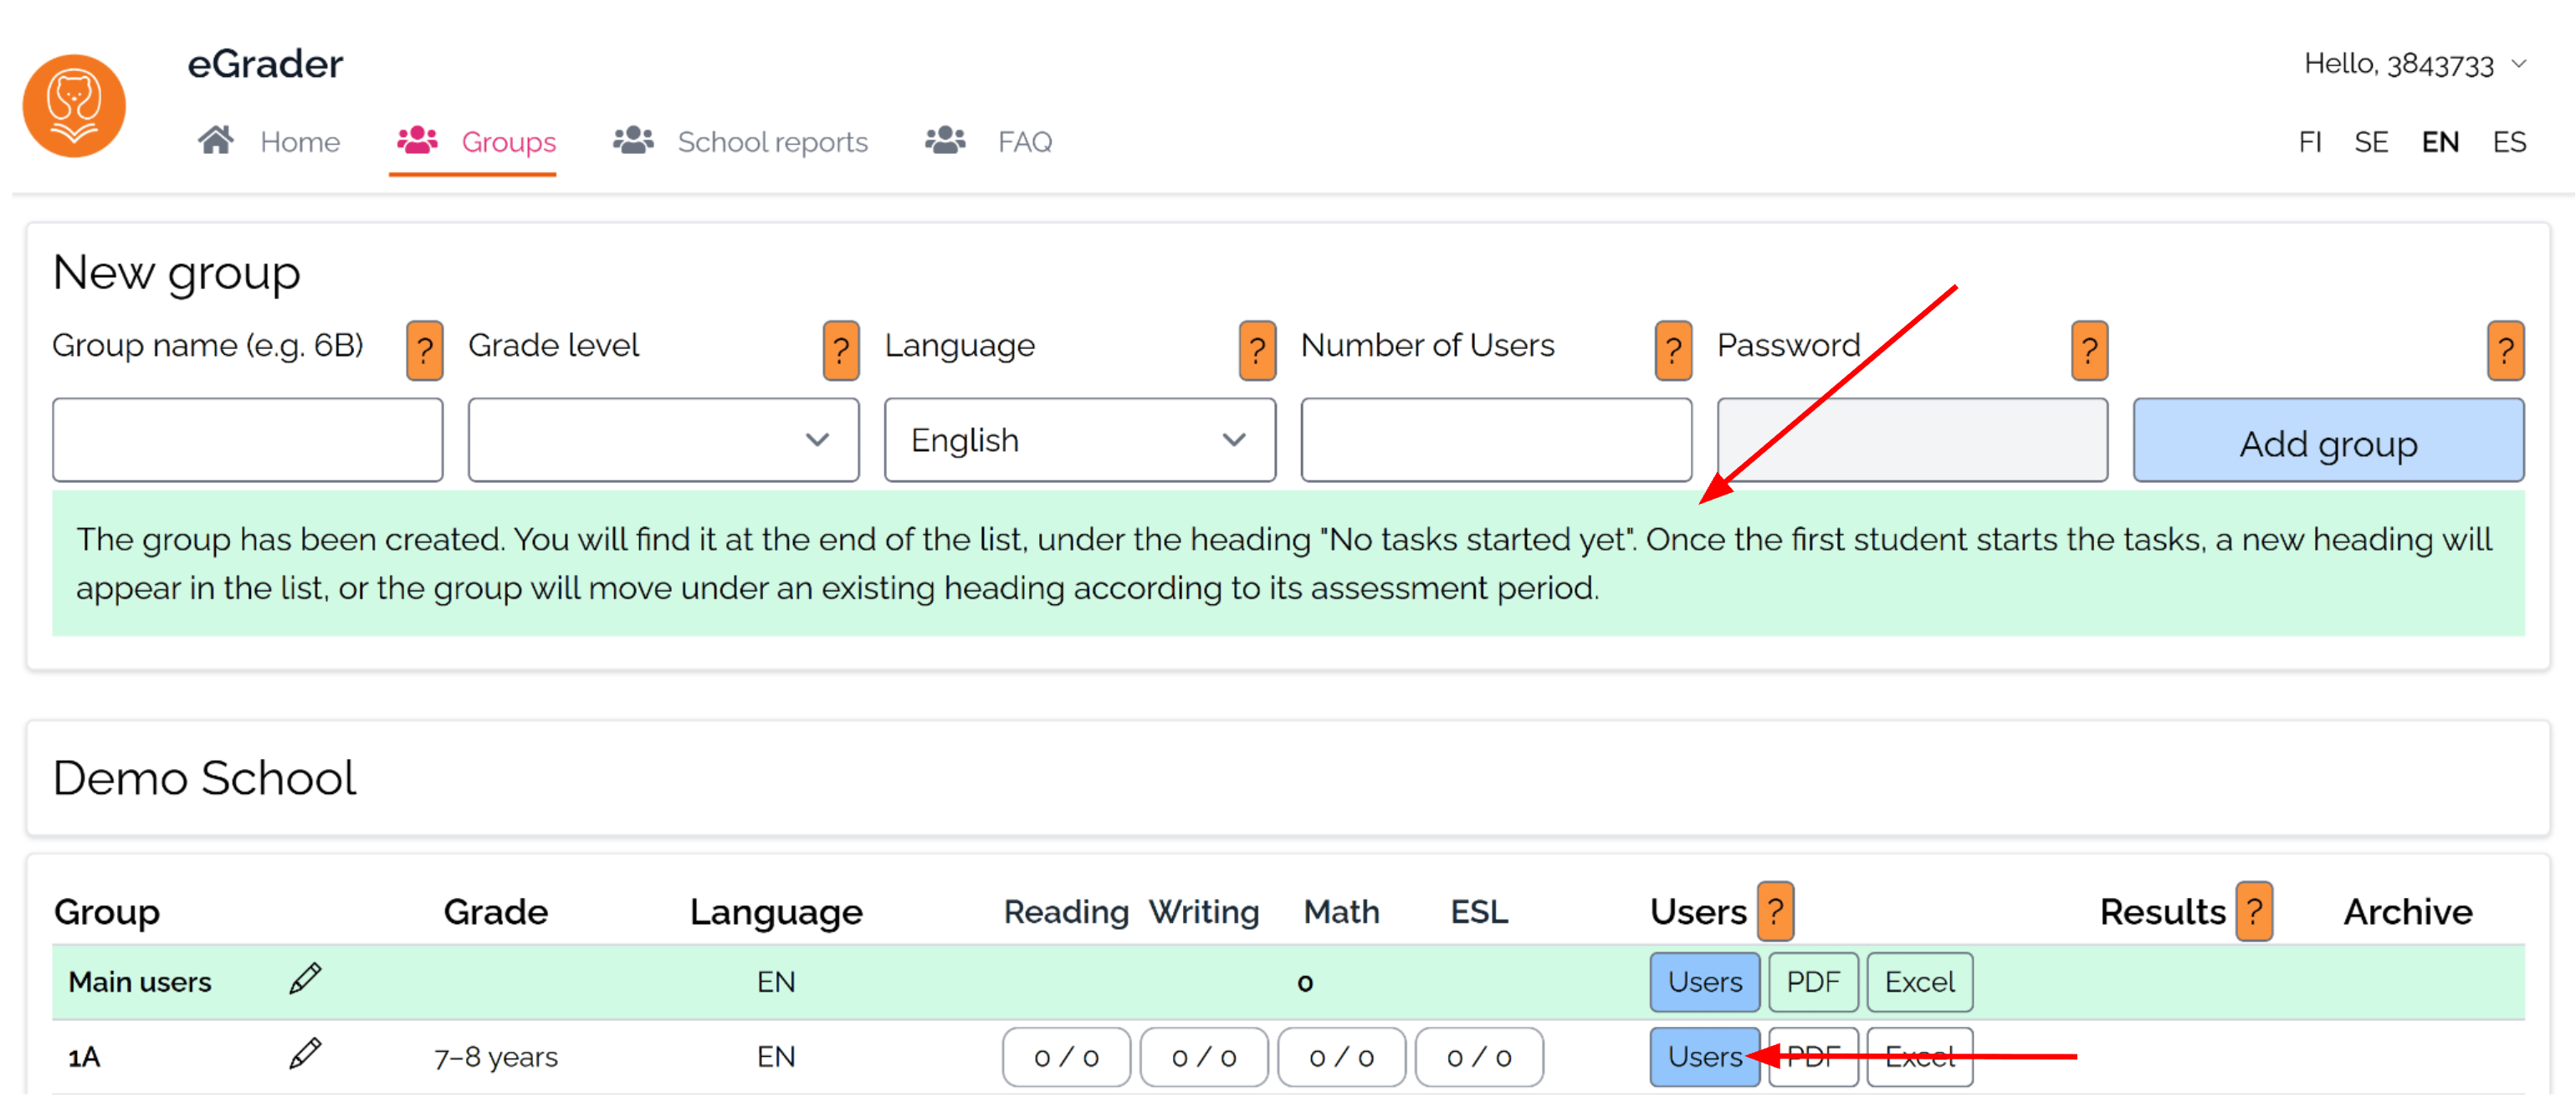
Click the Users button on your group’s row to open the group view and see the student login details.
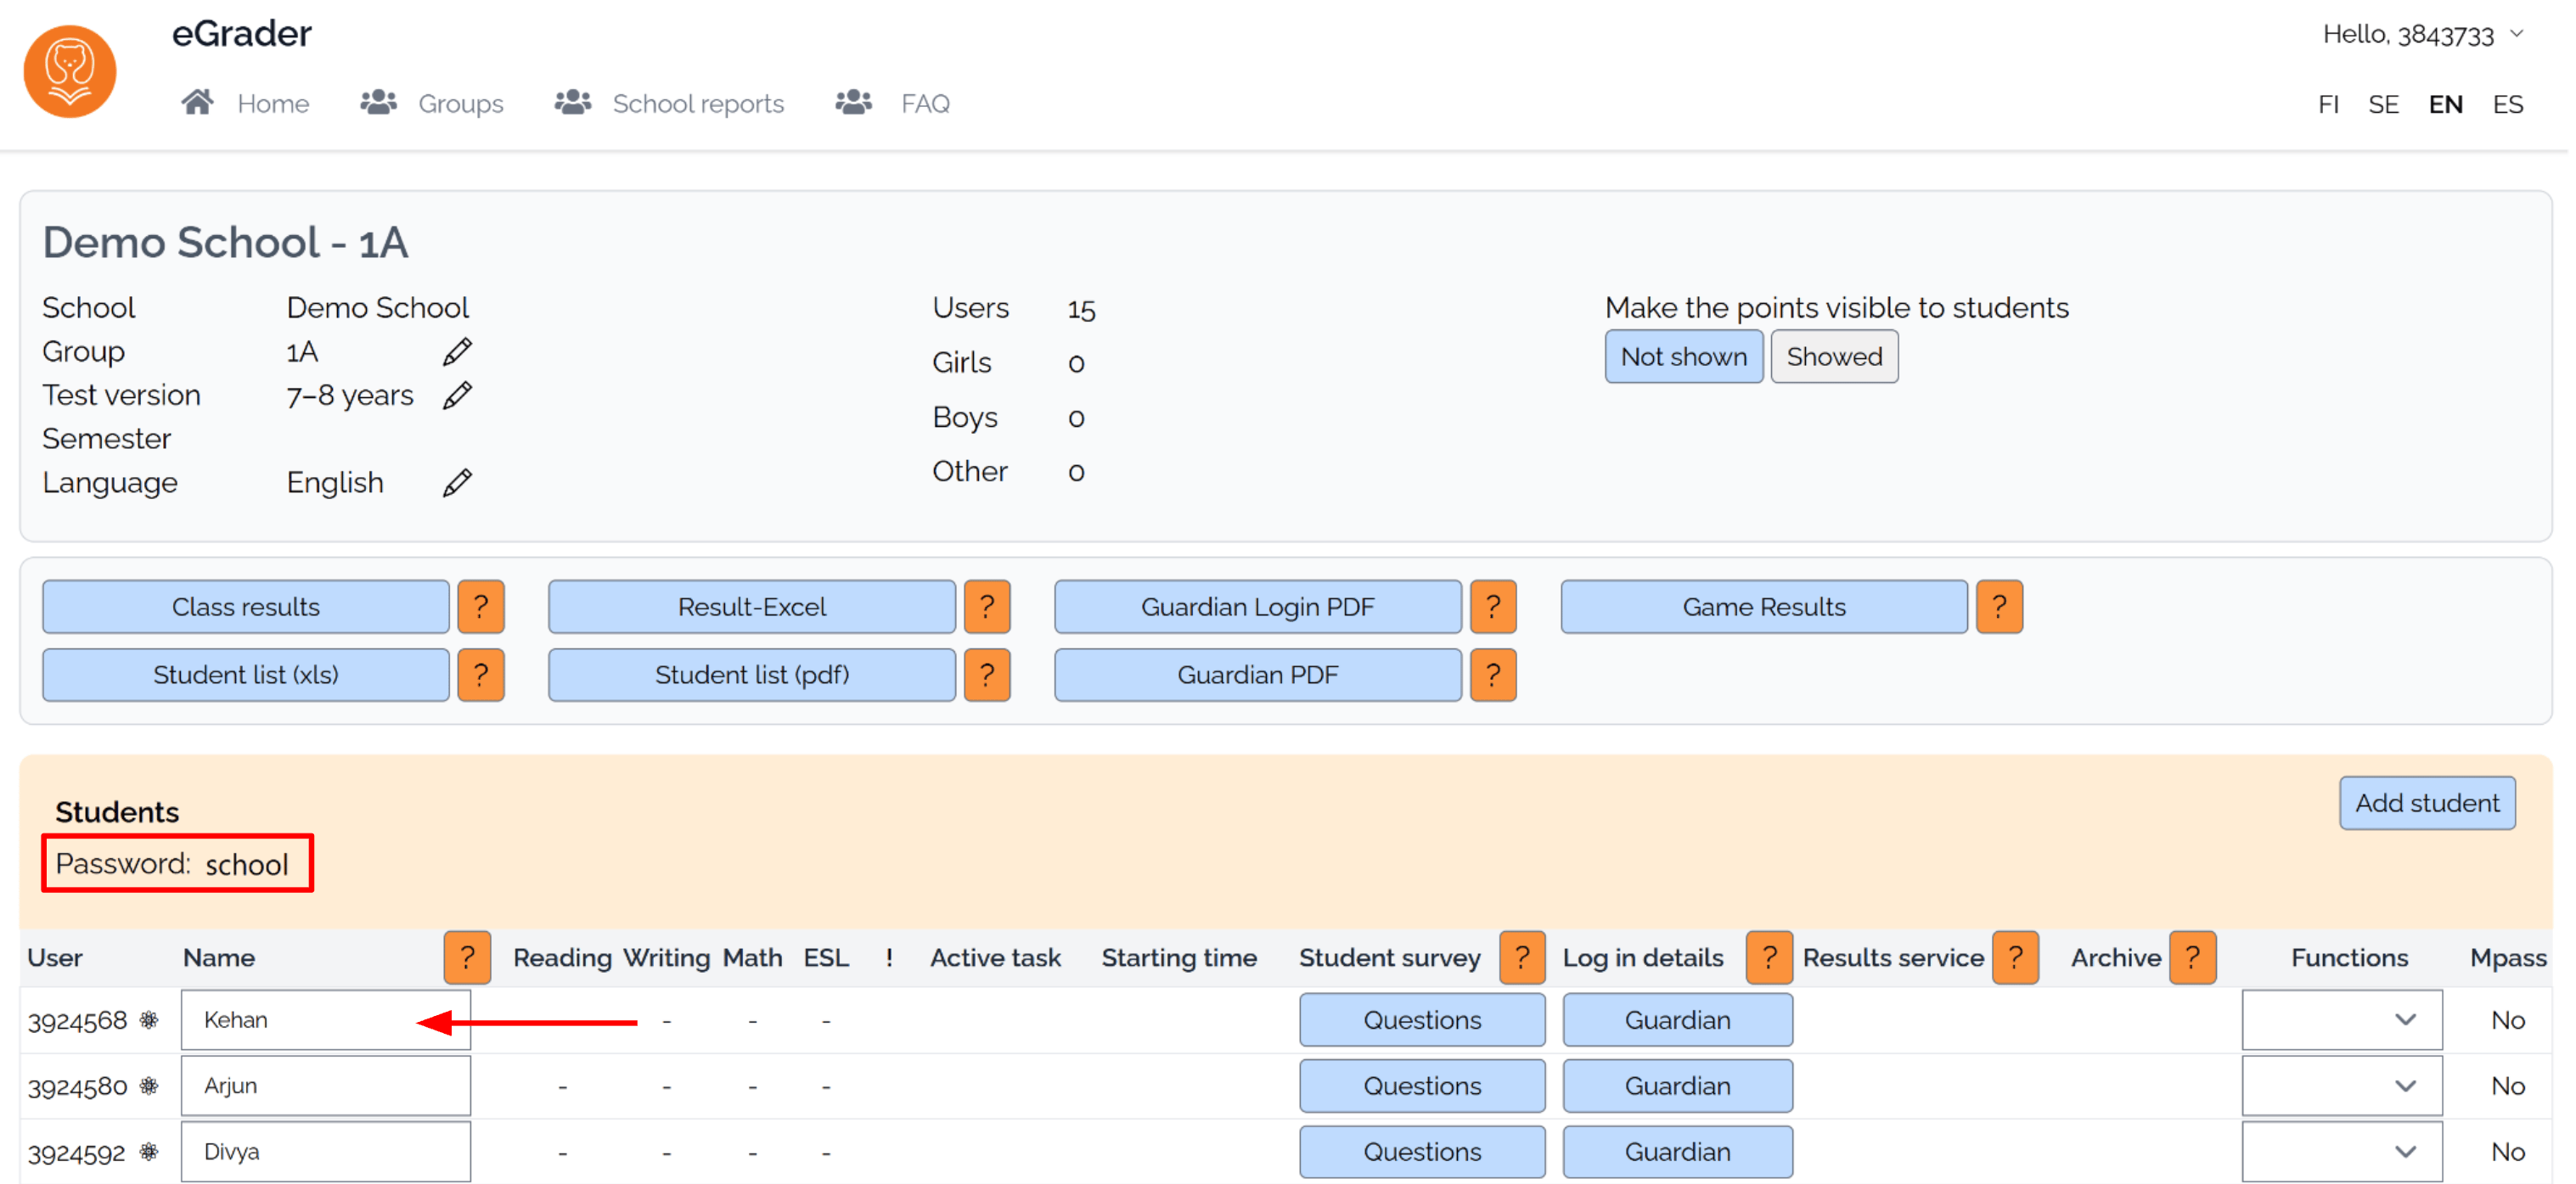
The class password is shown just above the student list; in this example, the password is school. Each student’s username appears in the left-hand column. Write the students’ names in the box to its right.
4. Print and share login details
Click Student list (pdf) to download the credentials as PDF and print them.

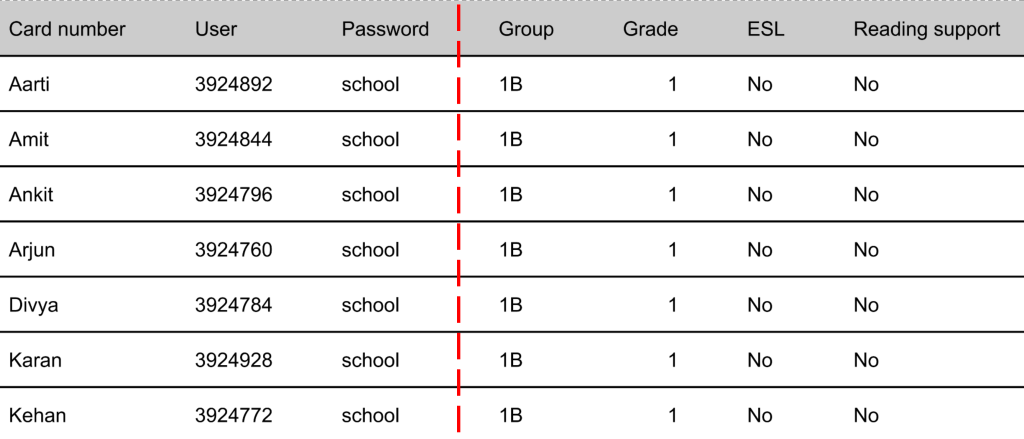
- First, cut the PDF in half so that each student’s card number/name, username and password stay together as shown in the image below.
- Then cut the list into strips and give each student their own strip showing their card number/name, username and password.
5. Student log in
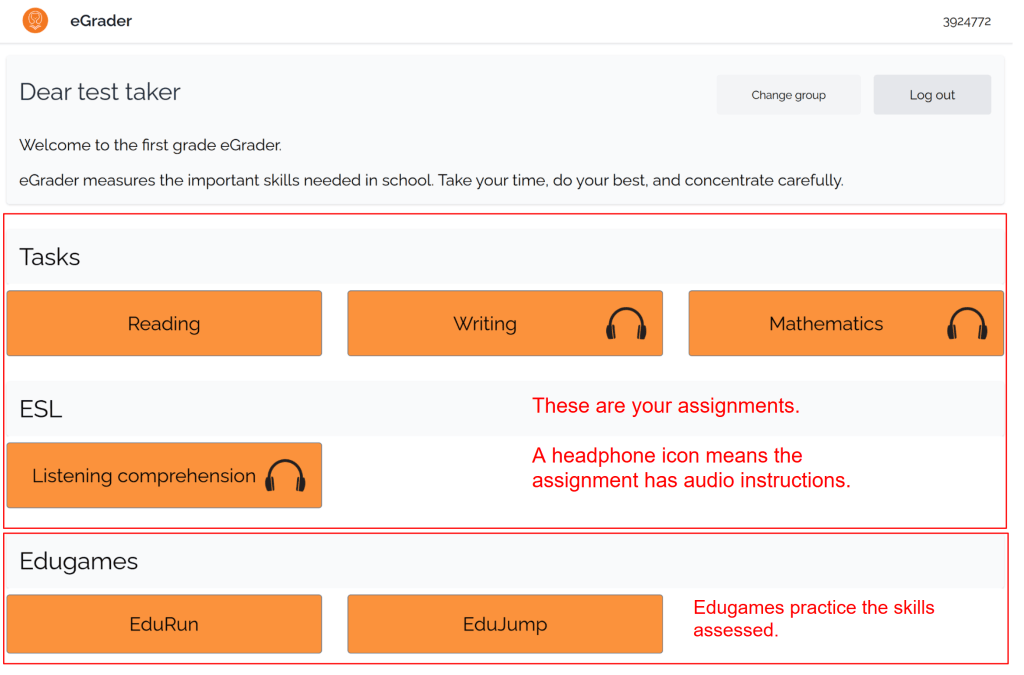
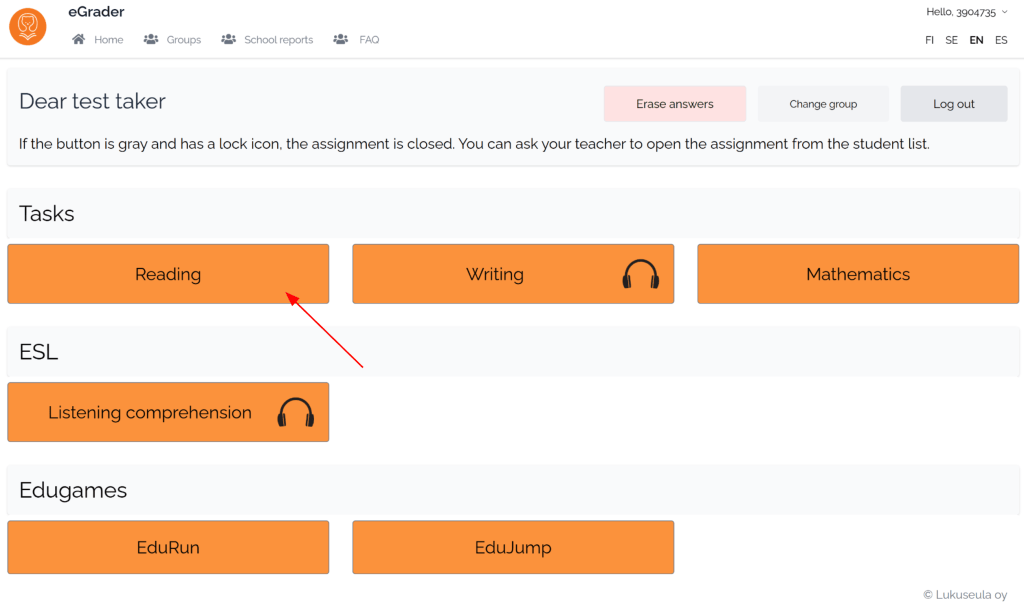
You can take the tests on a computer or a tablet. Some assignments also need headphones. Look for the headphone symbol.
- Ask students to type egrader.io into the address bar (not into a search box).
- Give each student a login strip with their card number/name, username and password. Ask them to log in.
6. Tests
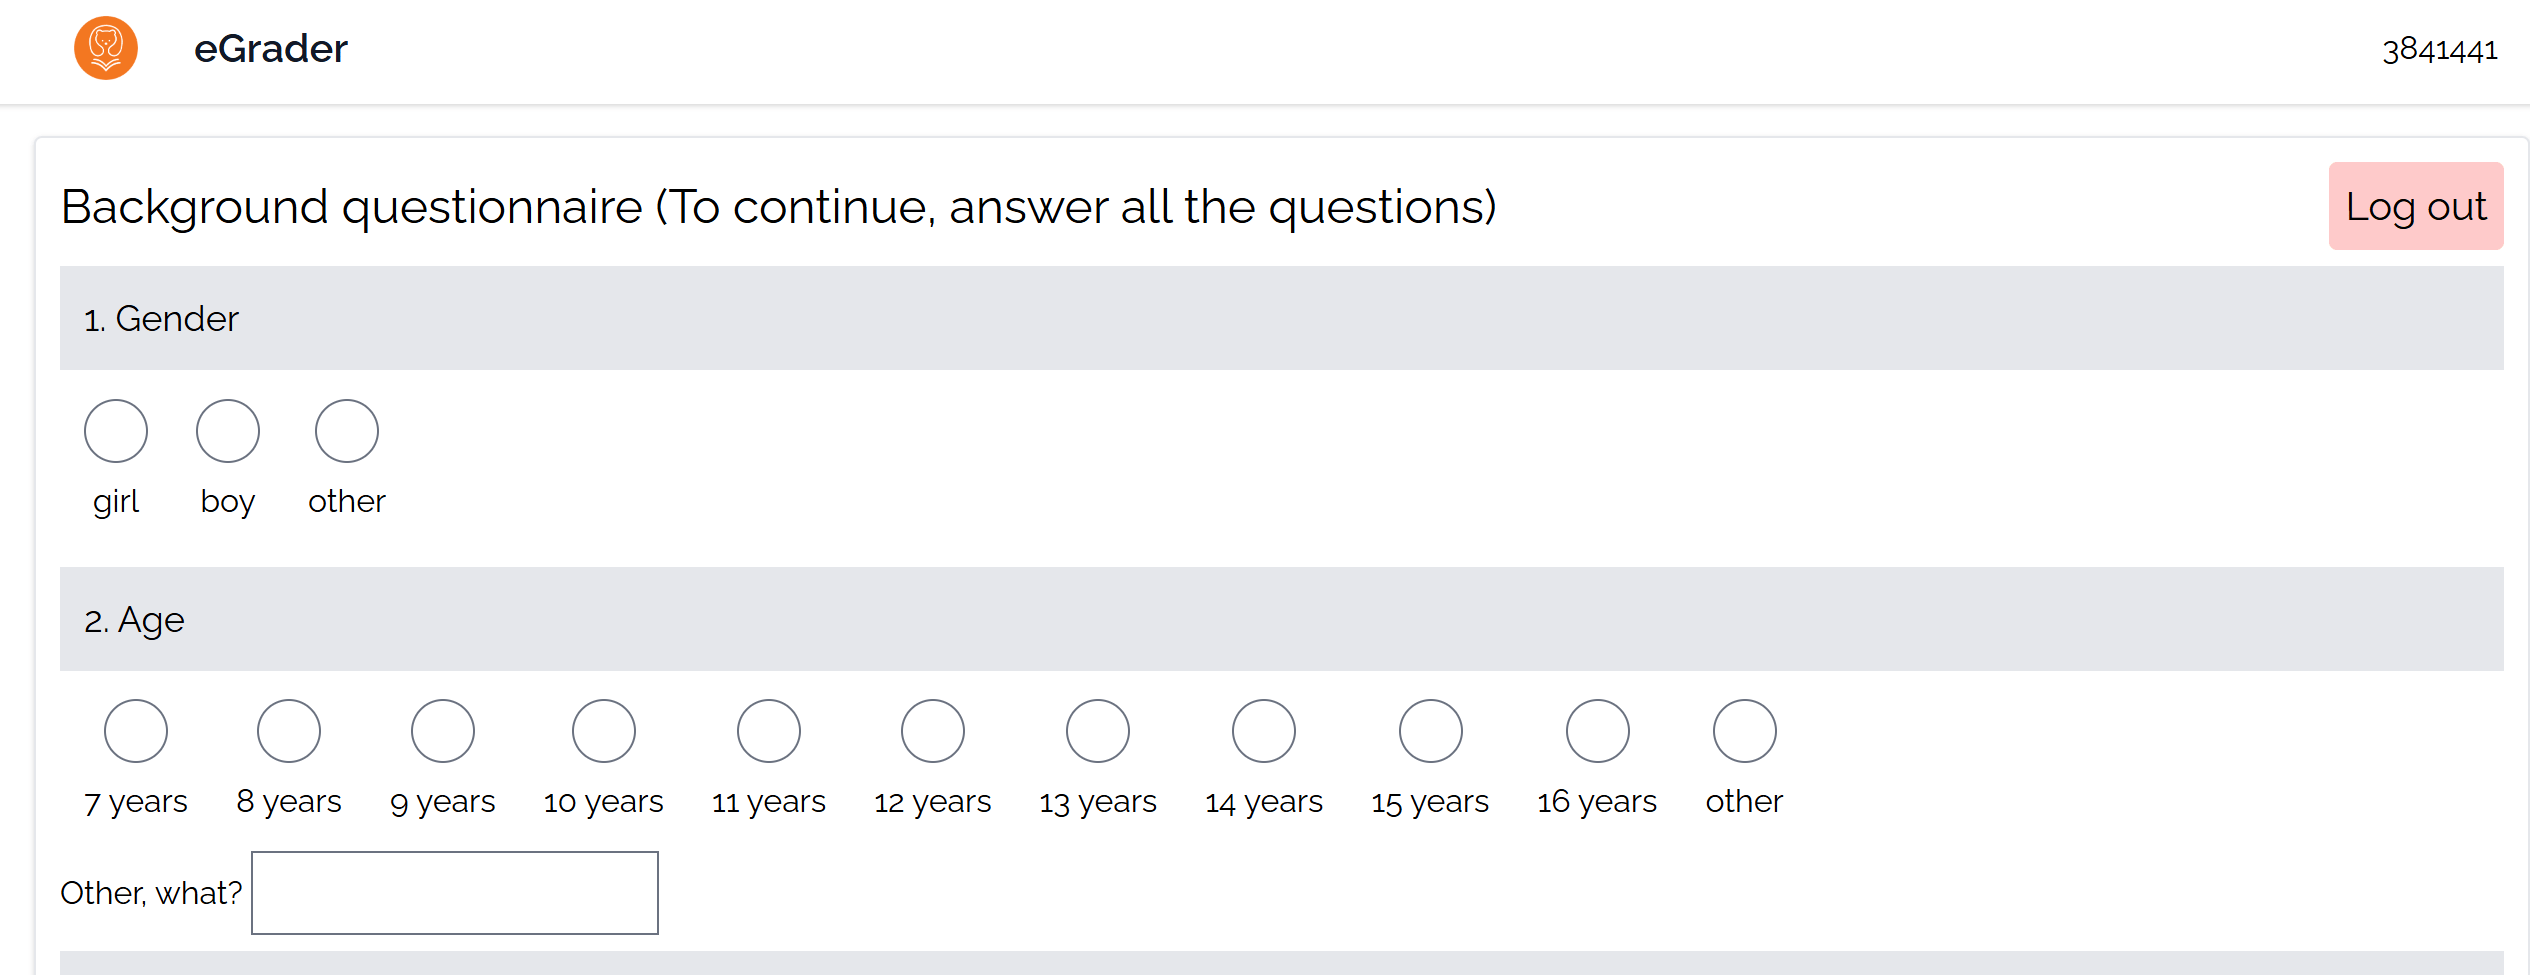
First, students answer a few background questions. They need to answer all of them to continue.
Next, the assignment menu opens. Below the assignments, you’ll find the Edugames. These are separate from the assessment.
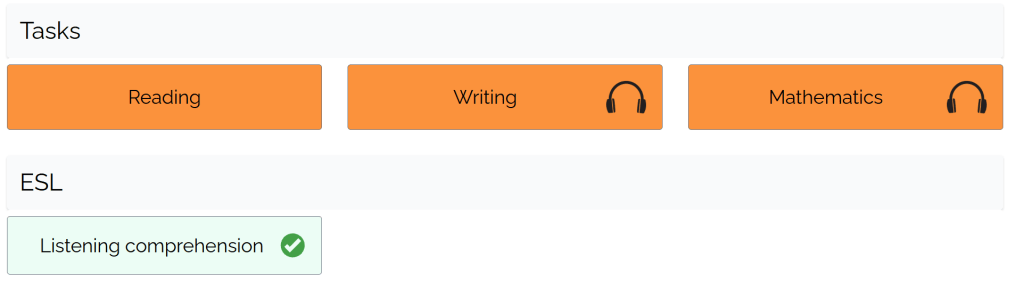
Once a student has completed an assignment, its button turns green and can no longer be opened.
7. Before the assessment
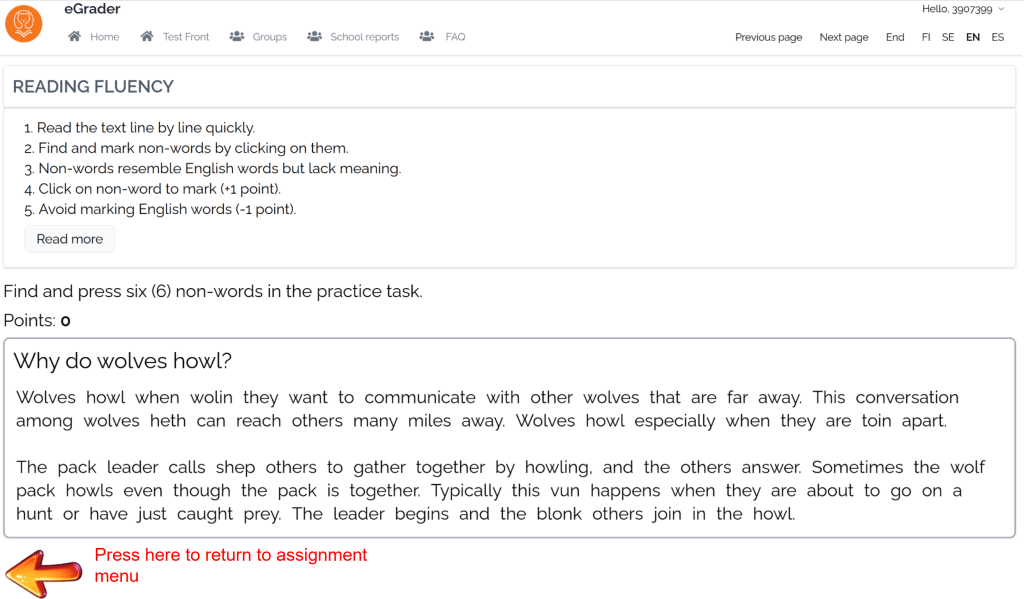
Each assignment starts with instructions and a practice item. We recommend going through them together with your students.
You can try an assignment yourself. Go to the Home page, open the correct age group, and select the assignment. When you have finished, click the pink Erase answers button in the top to start again from the beginning.
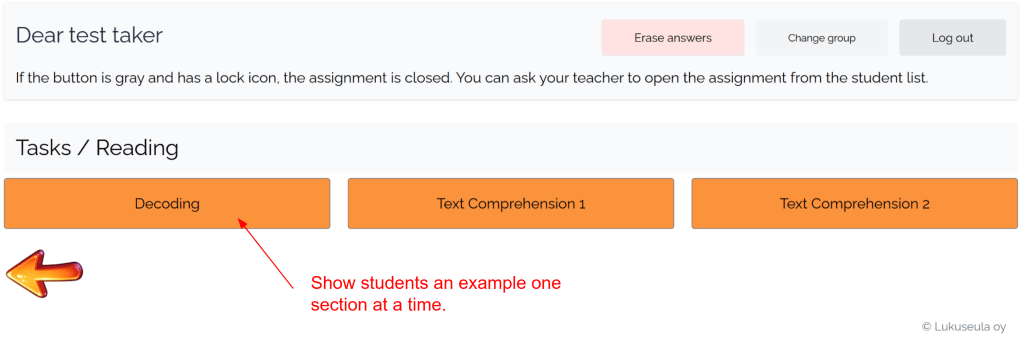
To show students an example, open the instruction section at the start of a task. To return to the assessment menu, press the orange arrow in the left corner.

8. Viewing the results
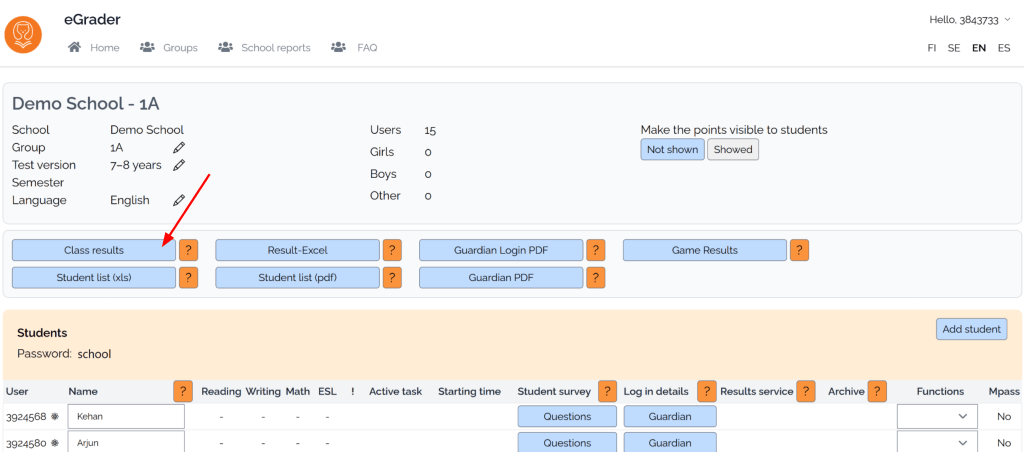
Once students have completed the assignments, open the group view and click Class results.
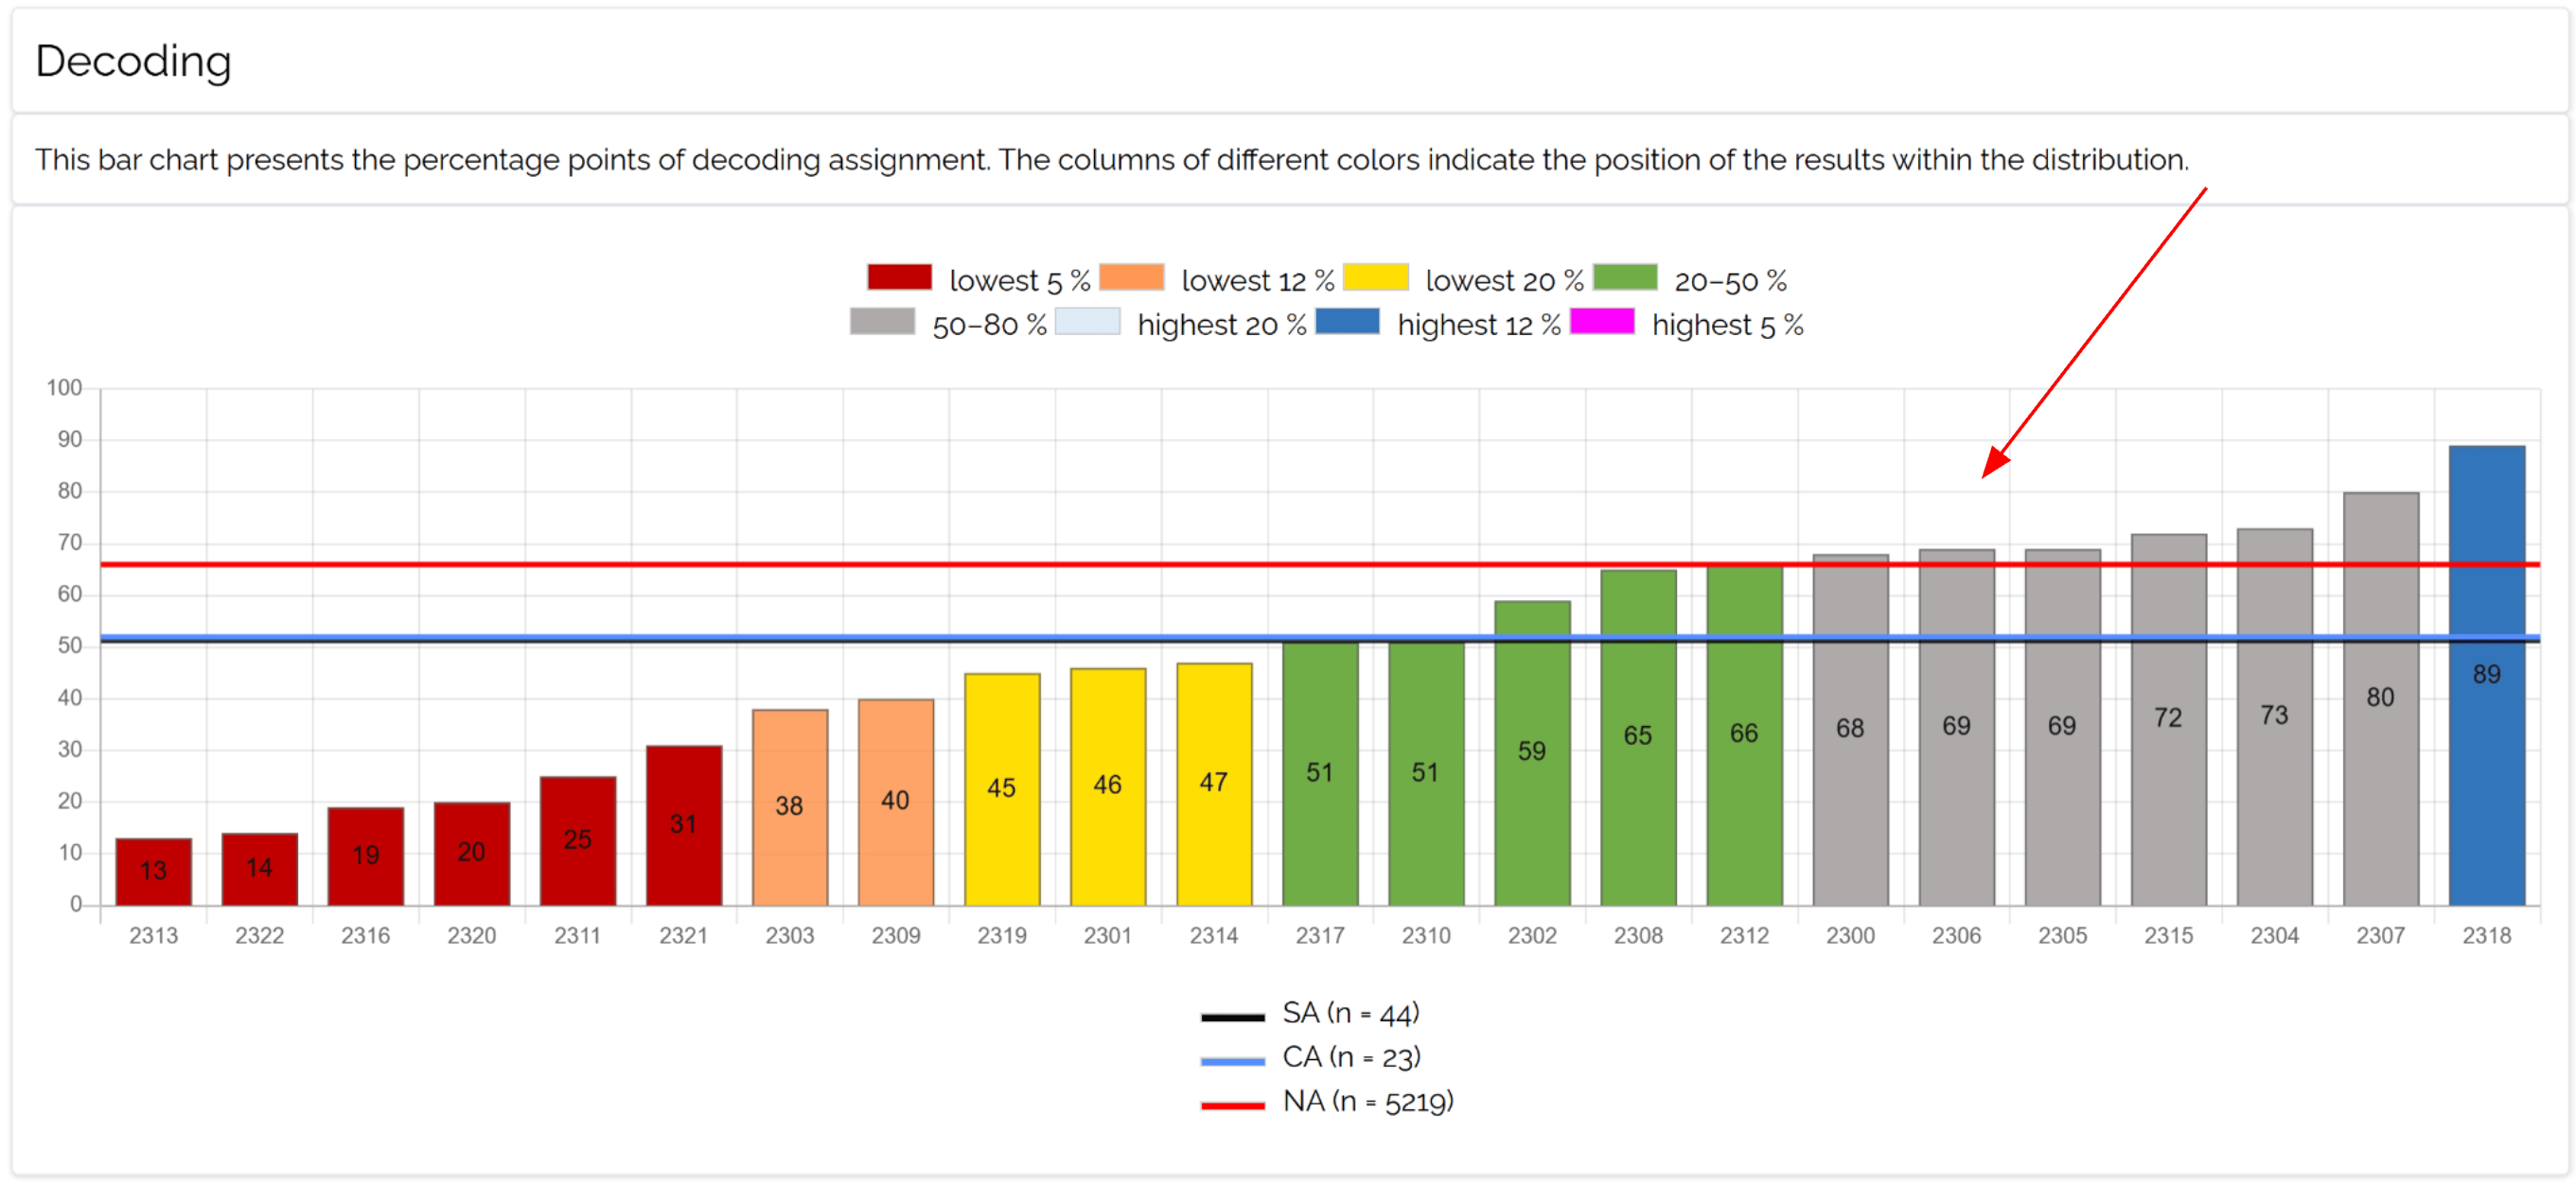
You will see a colour-coded overview of each student’s performance across domains.
The reference lines show the School Average (SA), Class Average (CA) and Norm Average (NA).
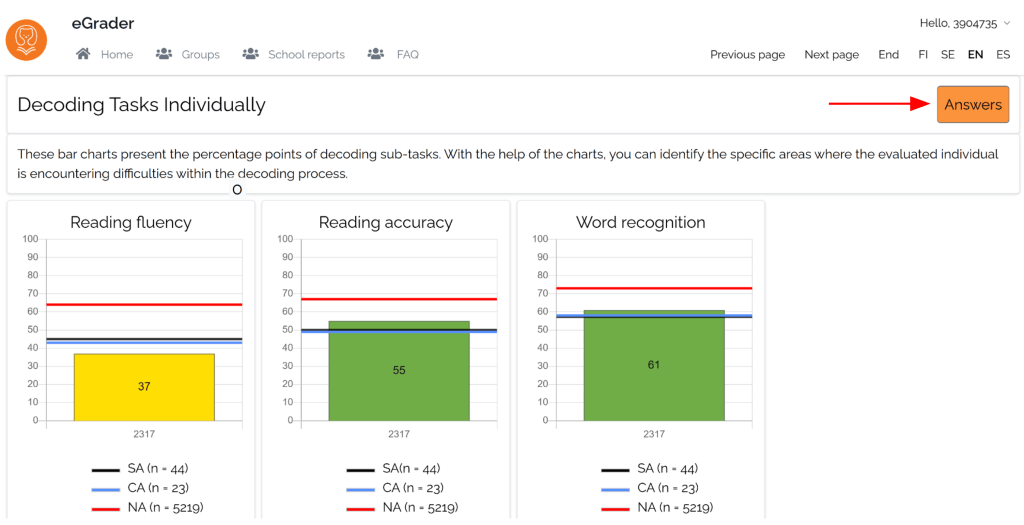
To open a student’s individual results, click their bar.
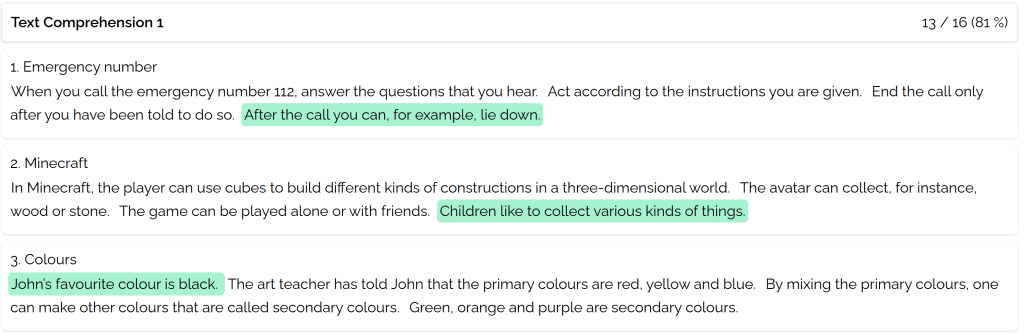
To see the answers for a specific domain click the relevant Answers button in the individual report.
Each colour shows where the result falls on the normal distribution based on our reference values:

Additional features
This guide covers the core assessment-to-results workflow
Tutorised also supports:
- Repeat assessments to track progress over time
- Teacher and guardian views
- School and municipal reports
Have a question? We’re here to help.
Feel free to email us at:
info@tutorised.com